Citation
BibTEX
@misc { npapadopoulos_gameboy_development_part_1:_hello_world!,
  author = "Nikolaos Papadopoulos",
  title = "Gameboy Development, Part 1: Hello World!",
  howpublished = "\url{https://www.4rknova.com/blog/2023/08/06/gb-dev-pt-1}",
  month = "08",
  year = "2023",
}
IEEE
[1] N. Papadopoulos, "Gameboy Development, Part 1: Hello World!",
    https://www.4rknova.com, 2023. [Online].
    Available: \url{https://www.4rknova.com/blog/2023/08/06/gb-dev-pt-1}.
    [Accessed: 01-03-2025].
Table of Contents
Introduction
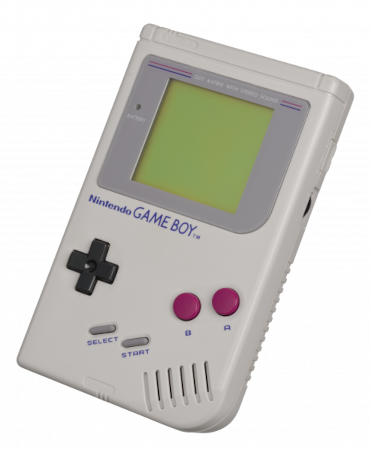
The original Nintendo Gameboy was released in 1989 and is one of the most recognisable game consoles from the 90s era. I’ve always wanted to write a game for it, but sadly this was a project that I kept postponing, mainly due to the associated complexity and dedication required when working with assembly code.
This series of blog posts aim to serve as a collection of notes for myself, but I am also taking this opportunity to share my findings in the hope that they may be useful for your own projects.
My objective is to create a simple, yet fully functional game, written entirely in assembly. I will begin this journey with the simplest possible program that runs on the Gameboy and build upon it iteratively. In each iteration, I will go through the code, line by line, and explain what each instruction does. I will also try to give further context around some subtle details that might not be obvious at first glance.
In this post, I introduce the development tools and then write a simple program that prints “hello world!” on the screen.
The tools of the trade
My development platform is Debian Linux, however you should be able to follow the same process under any OS. I use the RGBDS toolchain, with Vim serving as my IDE, and BGB for debugging.
You can download the toolchain and the debugger using the links below:
The toolchain is fairly simple to follow.

| rgbasm | The assembler, translates the source code into an object file |
| rgblink | The linker, links the object files rgbasm produces into a ROM file |
| rgbfix | Utility that calculates ROM checksums and sets up the header |
Hello Gameboy
So, without further ado, let’s dive into the implementation of a simple ‘hello world!’ program. Here’s the entire source code. It might look scary at first, but worry not, as I will go through every single line and explain what it does.
INCLUDE "hardware.inc"
VRAM_FONT EQU $9000
SECTION "Header", ROM0[$100]
Header:
    di
    jp Start
REPT $150 - $104
    db 0
ENDR
Start:
    .turnOffAudio
    xor a
    ld [rNR52], a
.waitVBlank
    ld a, [rLY]
    cp SCRN_Y
    jp c, .waitVBlank
.turnOffLCD
    xor a
    ld [rLCDC], a
.copyFontSetup
    ld hl, VRAM_FONT
    ld de, FontTiles
    ld bc, FontTilesEnd - FontTiles
.copyFont
    ld a, [de]
    ld [hli], a
    inc de
    dec bc
    ld a, b
    or c
    jp nz, .copyFont
.printString
    ld a, [de]
    ld [hli], a
    inc de
    and a
    jp nz, .printString
	ld a, %11100100
	ld [rBGP], a
	ld a, LCDCF_ON | LCDCF_BGON
	ld [rLCDC], a
.lockup
    jp .lockup
FontTiles:
INCBIN "font.chr"
FontTilesEnd:
HelloWorldStr:
    db "Hello World!", 0
This is what the result looks like on a gameboy:

Code walkthrough
I will explain the code by adding comments in each line. The program shown above is split into logical blocks and each block is analyzed separately.
hardware.inc
INCLUDE "hardware.inc"  ; This is a standard RGBDS header file
                        ; containing useful hardware definitions.
Definitions
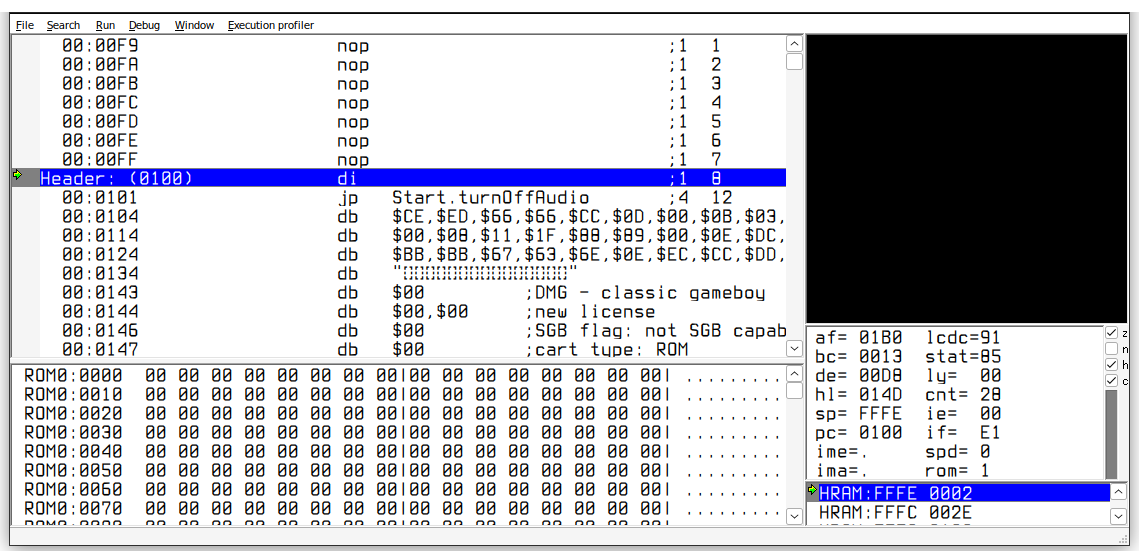
VRAM_FONT EQU $9000  ; This address is carefully selected so that the
                     ; ascii value in a text string, corresponds to the
                     ; tile number in this address space. Observe the
                     ; tile values in the debugger for a more intuitive
                     ; demonstration of how this works.
Header
SECTION "Header", ROM0[$100]
Header:          ; This is where execution begins          Cycles  Bytes
    di           ; Disable interrupts                        1       1
    jp Start     ; Jump out of header space                  4       3
                 ; and go to the start of the program
REPT $150 - $104 ; This space is reserved for the header
    db 0         ; data. RGBFIX will modify the contents.
ENDR
Disable audio
Start:
.turnOffAudio
    ; The explicit way of turning audio off is:
    ;                        Cycles   Bytes
    ;   ld a, AUDENA_OFF       2        1
    ;   ld [rNR52], a          4        3
    ;
    ; Since AUDENA_OFF is equal to 0, a slightly more efficient
    ; version is:
    ;                        Cycles   Bytes
    ;   xor a                  1        1
    ;   ld [rNR52], a          4        3
    ;
    ; Note that All arithmetic/logic operations that use register
    ; A as destination can omit the destination as it is assumed
    ; to be register A by default. So the following two lines have
    ; the same effect:
    ;
    ;   or a, b
    ;   or b
    ;
    xor a         ; Set register a to 0
    ld [rNR52], a ; Set the value at the respective memory address
Wait for Vertical Blank
.waitVBlank
    ld a, [rLY]       ; Load the LCD Y Coordinate.
    cp SCRN_Y         ; Check if the LCD is past VBlank
                      ; (rLY values of 144 to 153)
    jp c, .waitVBlank ; Loop until we are at VBlank
Turn the LCD off
.turnOffLCD
    ; See notes from .turnOffAudio above. The same optimization applies
    ; here. The explicit version of this would do:
    ;   ld a, LCDCF_OFF
    xor a             ; Set a to 0
    ld [rLCDC], a     ; Set the value at the respective memory address
Copy the font data
.copyFontSetup
    ld hl, VRAM_FONT  ; We will store the font data at this address
    ld de, FontTiles  ; Load the address for the font tile data in de
                      ; Load the size of the buffer in bc
    ld bc, FontTilesEnd - FontTiles
                      ; The font data is exactly 2048 bytes long
                      ; After copying the font below, HL will point to
                      ; the display VRAM address $9800. This is
                      ; intentional, and very important to understand
                      ; in order to follow why we are able to copy data
                      ; to the screen.

.copyFont
    ld a, [de]     ; Grab 1 byte from the source
    ld [hli], a    ; Load value at the destination, incrementing hl
    inc de         ; Move to next byte
    dec bc         ; Decrement count of bytes that we need to copy
    ld a, b        ; Check if count is 0, 'idec' doesn't update flags
    or c           ; Equivalent to 'b or c', 0 if all bits are 0
    jp nz, .copyFont ; Loop until the memory copy concludes
                     ; At this point HL will map to the display VRAM
                     ; address because of where the font is copied
                     ; and the size of the font data (see above). This
                     ; is a subtle but very important detail to
                     ; understand.
Print ‘Hello World’ on screen
.printString
    ld a, [de]   ; The string data starts right after the font data
                 ; which is exactly where DE is pointing to now
    ld [hli], a  ; Load value at the destination, incrementing hl
    inc de       ; Move to the next byte
    and a        ; Check if the byte we just copied is zero

    jp nz, .printString ; Loop until it is
Turn the LCD on
    ; During the first (blank) frame, initialize display registers
    ld a, %11100100
    ld [rBGP], a

    ; Turn the LCD on
    ld a, LCDCF_ON | LCDCF_BGON
    ld [rLCDC], a
Lock up
.lockup
    jp .lockup  ; This is essentially an endless loop
Data
FontTiles:
INCBIN "font.chr"        ; Binary file containing the font data
FontTilesEnd:
HelloWorldStr:
    db "Hello World!", 0 ; The hello world string